Predator Free Wellington
  • Our project
    • Our project
    • News
    • FAQs
    • Knowledge hub
    • Meet our team
    • Our impact
    • Our progress
    • Our supporters
    • Contact us
  • Sign up – Phase 2
    • Phase 2
    • Phase 2 volunteering
  • Miramar
  • Trapping
    • Find a trapping group
    • Community heroes
    • Knowledge hub
  • Support us
  1. Home
  2. Trapping
  3. Knowledge hub
  4. How to build a corflute trapping tunnel

How to build a corflute trapping tunnel

A simple trapping tunnel

This is a great trap to place in trees to catch for tree-dwelling ship rats. A T-Rex or Victor trap works well with this tunnel.
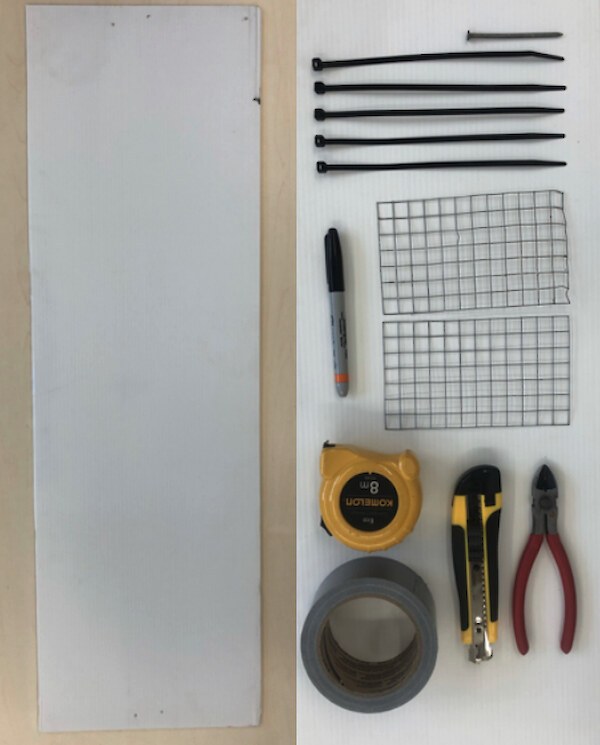
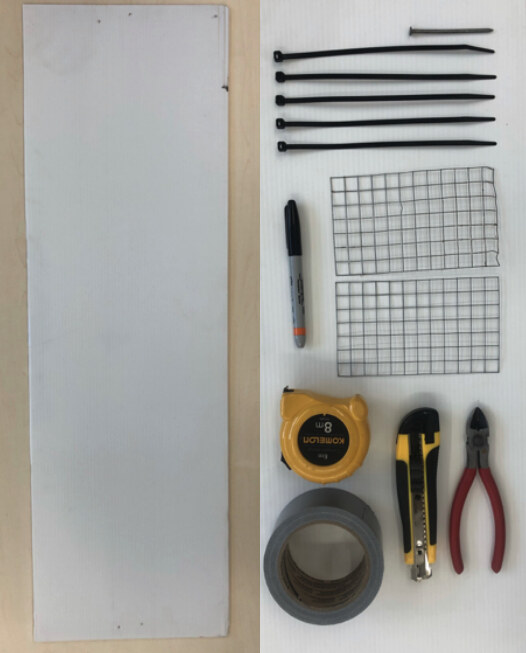
Materials you’ll need:

  • Corflute – 90cm x 30cm (or ¼ of a standard real estate sign)
  • 6x cable ties
  • 1x nail
  • 2x mesh squares – 9cm x 15cm (or 7 squares of 12 by 12mm mesh)
  • Craft knife
  • Tin snips or pliers
  • Ruler

Step 1 – cut the corflute

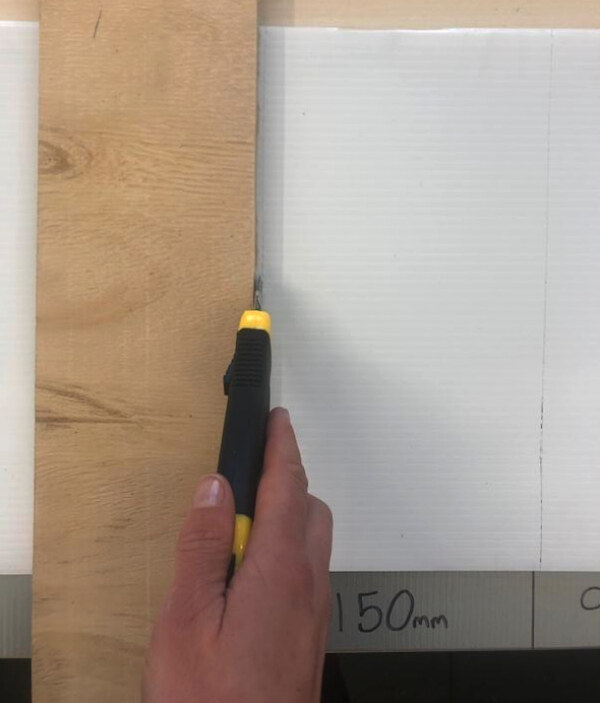
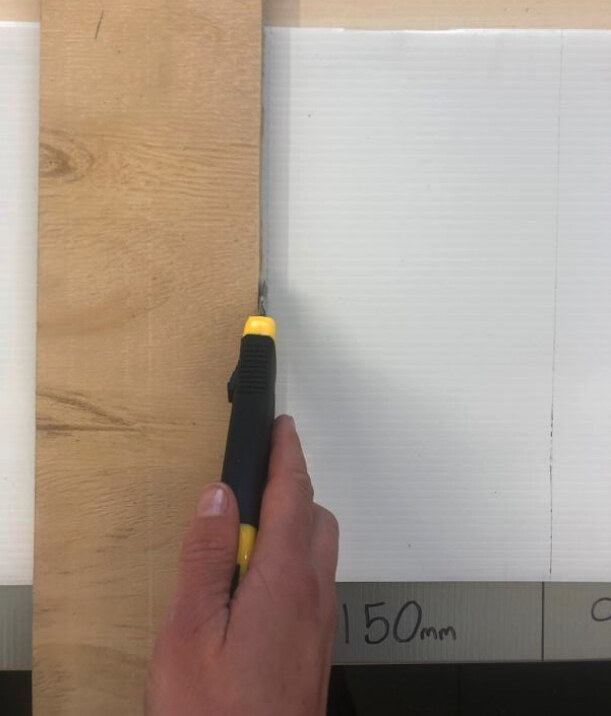
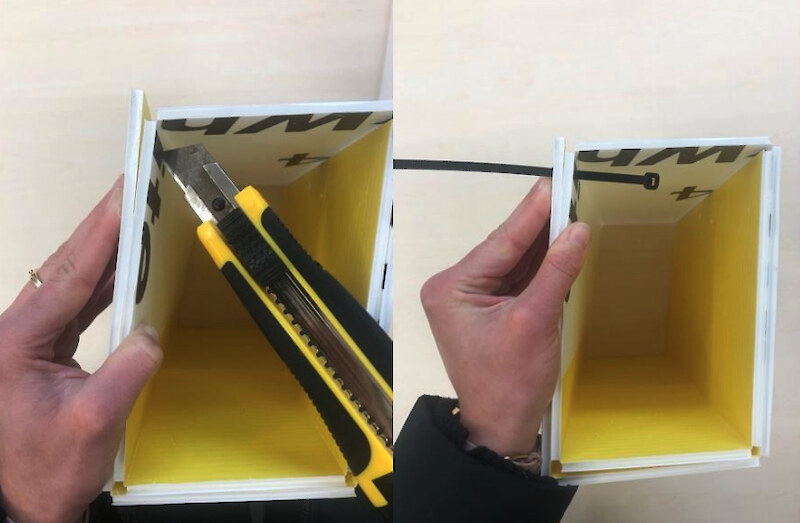
Along the long edge of the corflute, measure and mark points at 100mm, 255mm, 345mm, 495mm, 585mm and 735mm. Using your ruler and craft knife, score a perpendicular line at each mark, cutting about halfway through the corflute.
Step 2 – shape the tunnel

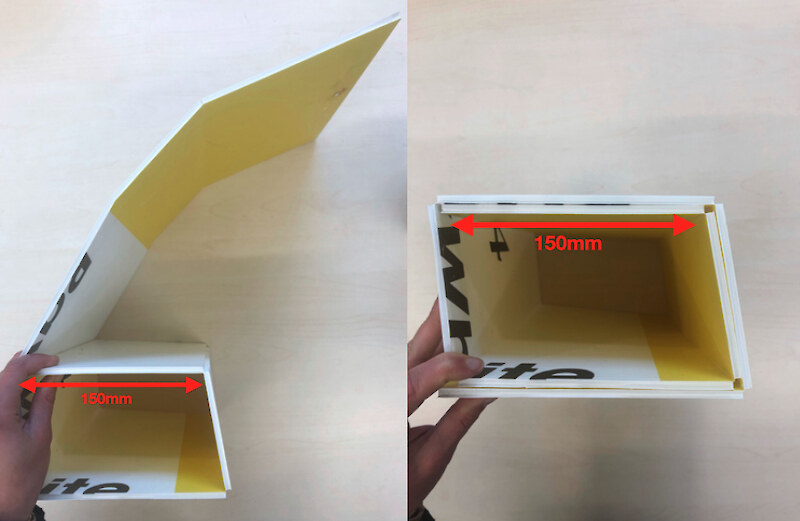
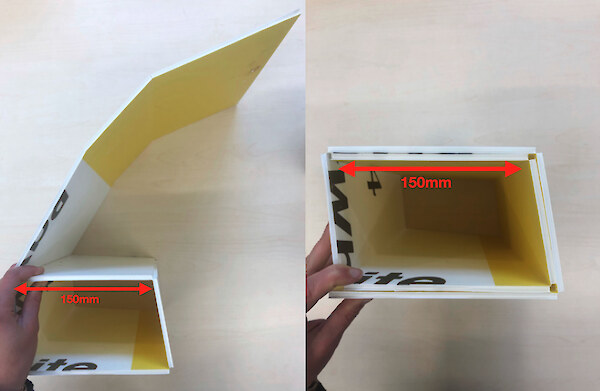
Bend along each score line to create seven rectangular panels. Roll the corflute up to create your tunnel. The inside dimensions should be 150mm tall and 90mm wide.
Step 3 – attach the edges

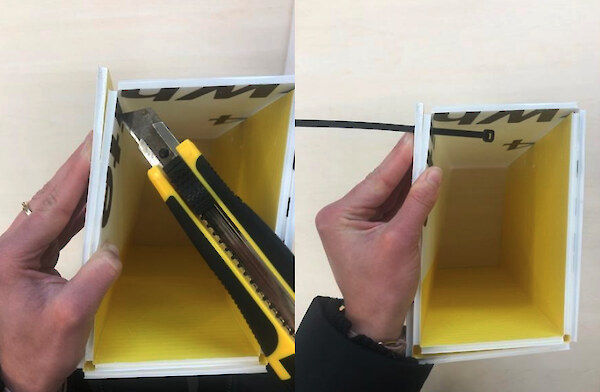
Create a hole with the craft knife at each end to cable tie the loose side flap of the tunnel.
Step 4 – add the door

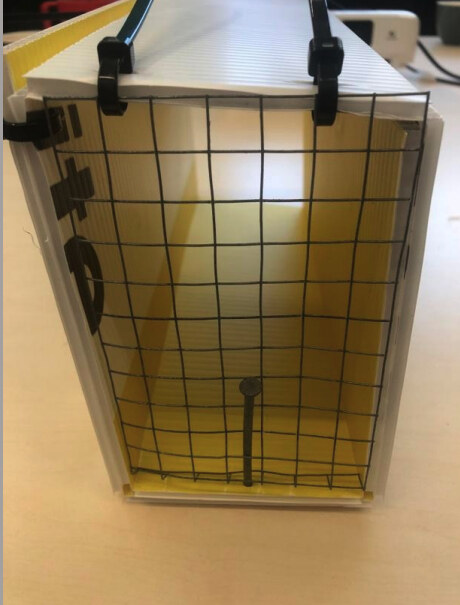
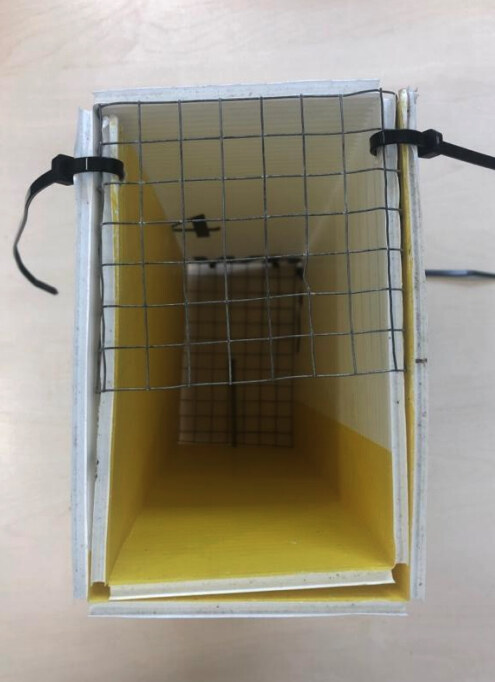
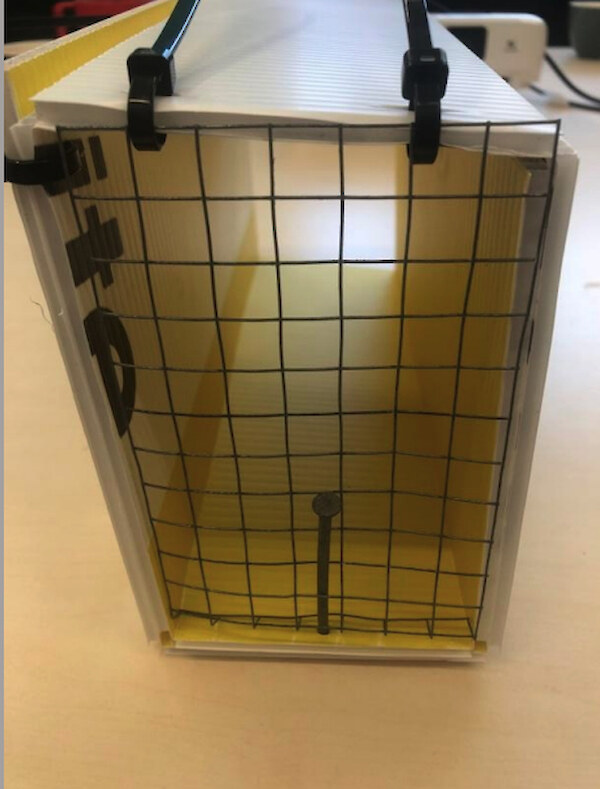
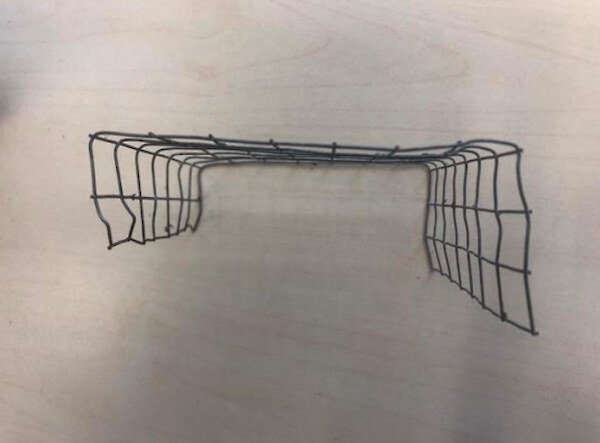
At one end attach a piece of mesh with two cable ties (these will be a hinge for the tunnel door). Bend over one row of mesh at the ‘bottom’ (opposite edge to the hinge) and push a nail through the mesh and into the base of the tunnel to secure the door.

Step 5 – make the opening

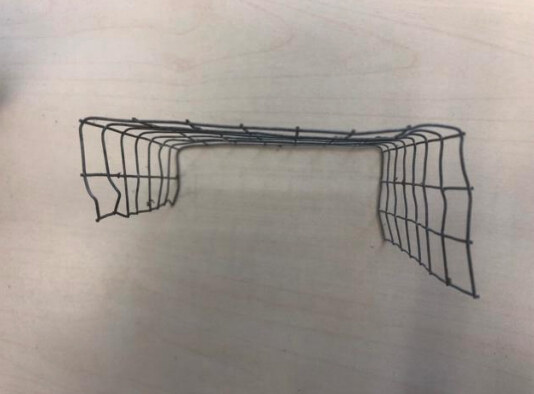
On the other end, fold each side of the mesh so it sits across the opening and has space for a rat to enter. Cable tie this mesh to the tunnel.
Step 6 – attach it to a tree

Trim the cable ties and tie or nail your tunnel to a tree.

See a PDF version of these instructions

  • Facebook
  • Instagram
  • LinkedIn
  • Contact us
  • Receive our newsletter

© 2026 Predator Free Wellington • Privacy statement • Website by RS

  • Home
  • Our project
    • Our project
    • News
    • FAQs
    • Knowledge hub
    • Meet our team
    • Our impact
    • Our progress
    • Our supporters
    • Contact us
  • Sign up – Phase 2
    • Phase 2
    • Phase 2 volunteering
  • Miramar
  • Trapping
    • Find a trapping group
    • Community heroes
    • Knowledge hub
      • Our urban predator free blueprint (2024)
      • Most Significant Change (2025)
      • Return on investment (2025)
      • The value of volunteers (2024)
      • Habitat preferences of Ship rats (2023)
      • Social-ecological research (2022)
      • People, nature and wellbeing (2020)
      • Predator Free Miramar: How to kill rats and engage a community (2019)
      • Biosecurity: Rat or mouse?
      • Biosecurity: Rat or wētā droppings?
      • Biosecurity: Chew marks and chew cards
      • Biosecurity: Tracking tunnels and prints
      • How to get trapping (guide)
      • How to build a trapping tunnel
      • How to rat proof your compost
      • How to make a wētā hotel
      • How to build a corflute trapping tunnel
      • H2Zero trial – case study
      • Improving our biosecurity – case study
      • Using dog detectors early – case study
      • How to maintain your Victor rat trap
      • How to run a tunnel building workshop
      • Conceiving an unfenced urban ecosanctuary at Mātai Moana (2024) – external link
      • Estimating the impact of Predator Free Wellington on tree wētā (2025) – external link
      • Assessing the effects of predator control and habitat on lizards in an urban landscape (2025) – external link
      • Webinar - Analysis of Predator Free Wellington data from Miramar (2024)
  • Support us
  • Facebook
  • Instagram
  • LinkedIn
  • Newsletter signup
  • Search...